How to implement Fingerprint.js with Google Tag Manager
Fingerprint.js is a tiny JavaScript library that creates unique browser fingerprints based on a whole host of factors. It claims to identify browsers to an accuracy of 94%. Whilst this isn't 100% percent it still is a very high figure and there are still benefits to this kind of tracking (I plan to cover this more in depth in a future post).
Fingerprinting, as this method is called, uses information gathered from a browser such as resolution, plugins and timezone to generate a unique fingerprint. This means that fingerprinting doesn't rely on cookies to determine users. I'll mention that again. Fingerprinting does not use cookies, which is a huge benefit. Another benefit of this is that whilst the fingerprint is unique it is still anonymous, which means we can tracking users down to the individual level in Google Analytics without breaching Google's terms of service. This part really excites me and this is what I am going to show you how to implement.
Step 1: Set up a new custom dimension in Google Analytics
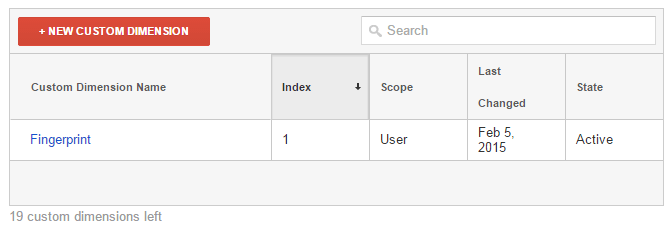
Click admin at the top of Google Analytics and under the property panel click on "Custom Definitions", then click on "Custom Dimensions". Click the big red button which says "New Custom Dimension". The name of the new custom dimension is "Fingerprint", the Scope is "User" and we want it to be active. Click create. The scope is the only part here that needs explaining.
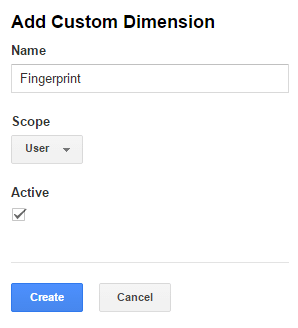
Just click continue on the screen that talks about the schema. We avoid those complexities by using Google Tag Manager.
Step 2: Set up Google Tag Manager
This is the fun part.
Create a macro
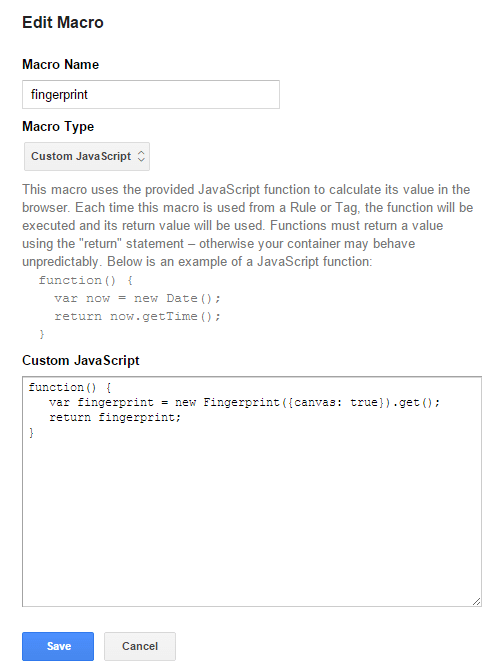
First create a new macro called fingerprint. It's type is Custom JavaScript. Paste the following code into the field.
function() {var fingerprint = new Fingerprint({canvas: true}).get();return fingerprint;}
Don't worry this isn't suspicious or malicious. This is basically telling the browser to create a new fingerprint (the var fingerprint line) and then give us the value (return fingerprint). Custom JavaScript macros are amazingly useful, however they require some basic JavaScript knowledge. If you aren't JavaScript literate that's ok. Just follow my instructions carefully. We use this macro in GTM as the value of the fingerprint.
Create the Fingerprint.js tag
One of the most awesome (and dangerous) things about Google Tag Manager is its ability to inject large amounts of code. This is what we are going to do next. If you can, I would recommend putting the fingerprint.js JavaScript file in with the rest of your website's JavaScript libraries (ask a web developer about this if you are unsure) rather than creating this tag, however if you can't that is ok.
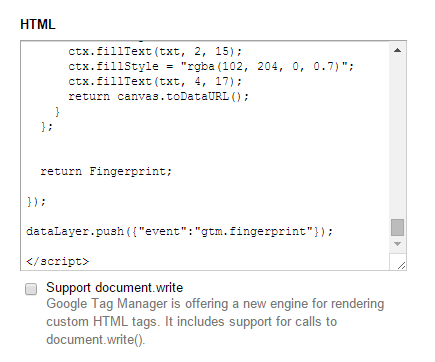
Create a new tag. Call it fingerprint.js. The type is Custom HTML Tag and the firing rules is All Pages. In the HTML section paste this:
<script type="text/JavaScript">dataLayer.push({"event":"gtm.fingerprint"});</script>
Now this is the tricky part. Go the Fingerprint.js's Github and copy the code from here and paste it in the script tag above the dataLayer.push code. Make sure you copy all the code and paste it between the script tags (also make sure you don't delete the dataLayer.push code.
This tag is the Fingerprint.js with a single extra line of code. This dataLayer.push pushes an event into Google Tag Manager's dataLayer. We are going to use this to fire the next tag we create.\
Create the final tag
Create one last tag called tag fingerprint. This tag will make use of our previous work to push the newly generated fingerprint into Google Analytics.
The tag type is Universal Analytics. The tracking ID is your Google Analytics tracking ID, if you followed my previous article the ID is the macro {{ga environment code}}. Enable display advertising features if you want. I always do.
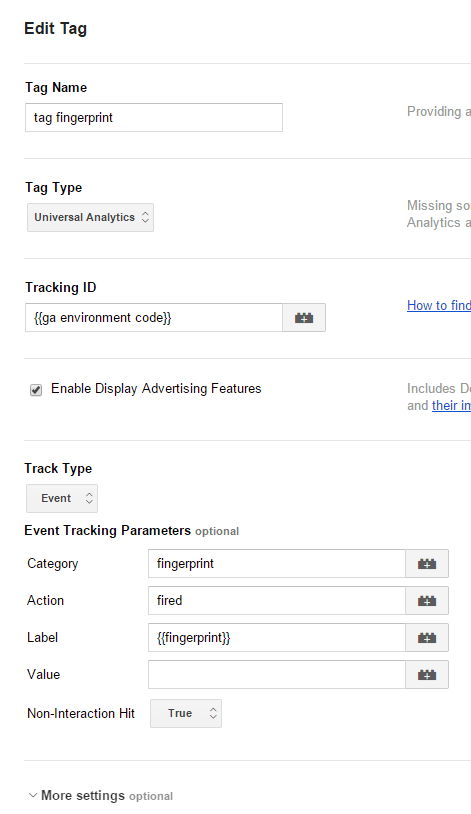
The track type is event. Category can be whatever you want, in my case fingerprint, action is fired and the label is our fingerprint macro from earlier - {{fingerprint}}. Non-interaction hit is set to true, this means that it won't count as an interaction with the page and not affect your bounce rate. I normally create events alongside pushing custom dimensions. Whilst it isn't necessary I find it easier to debug as in real time analytics you can see events in real time but not custom dimensions. Sometimes custom dimensions can take a few minutes to come through which is just too long.
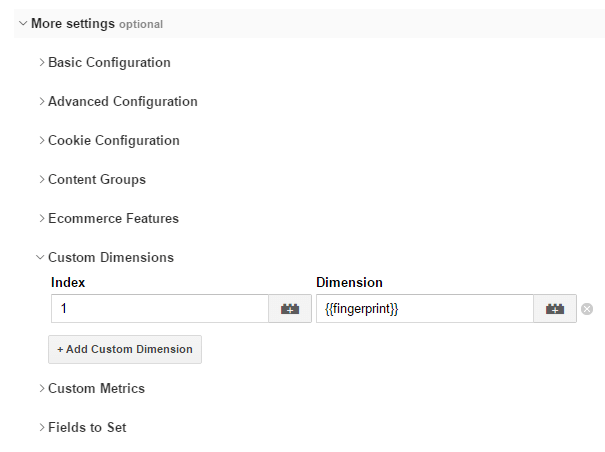
Finally open the more settings panel up and click custom dimensions (see above). Set the index to the index number in Google Analytics from the panel earlier, in my case (and most cases) this is 1 (see below). Set dimension to {{fingerprint}}.
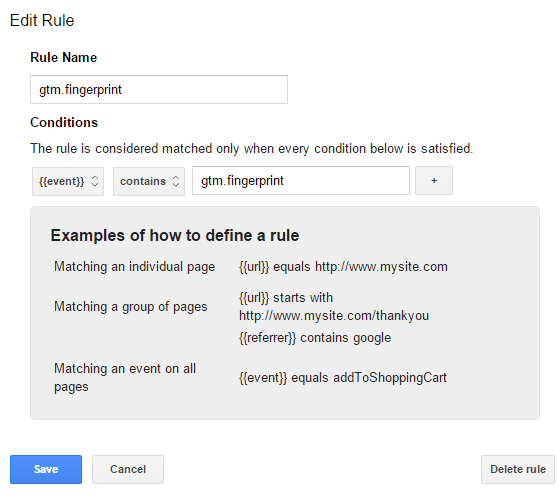
Scroll back up to firing rules and click add and create a new rule. Call it gtm.fingerprint. The conditions are {{event}} contains gtm.fingerprint (see image below). Click save.
Done.
So what happens when someone visits the site is that they trigger the fingerprint.js tag. This loads the code for fingerprinting. When the loading is complete it pushes an event to the dataLayer called gtm.fingerprint. This event then triggers our Google Analytics tag which sets the custom dimension as the fingerprint macro which uses the fingerprint.js code to create the fingerprint.
I think this is a rather simple implementation, especially in that it required very little code to be written. Please remember to debug your GTM container before you promote anything just to make sure you don't explode your website. And please, be very careful when creating custom HTML tags.


