How to switch analytics properties with Google Tag Manager

I think Google Tag Manager has to be one of the most underrated and overlooked tools in the Google arsenal. It is so powerful and versatile, yet very few people use it.
Google Tag Manager does have a steep learning curve though. It requires some abstract thinking at times and a basic understand of JavaScript to get the most out of it. Don't let that stop you. Dive in and give it a try.
In this article I will step through how to set up Google Tag Manager with two different Google Analytics properties - one for everyday use and one which will activate when Google Tag Manager is in debug mode. This will create a production and development environment of sorts which will keep your analytics clean when testing new ideas.
Step 1: Set up two Google Analytics properties
I use to get very confused with accounts, properties and views in Google Analytics, so I will take a moment to explain. An account is
the highest grouping. Ideally you should have one per website. You can have 100 Google Analytics accounts per Google account.
Under accounts sits properties. Every GA Account can have 50 properties. You can set up data imports here. This is the level in which we will use Google Tag Manager. Each property has its own Google Analytics tracking code.
Under properties sits views. You can have 25 views for every property. You would generally use views to set up differing goals and filters. My favourite use for views is to create one which has all the website data and another that has a filter that removes any traffic from the company I am working for or myself. We don't want to analyse our own data.
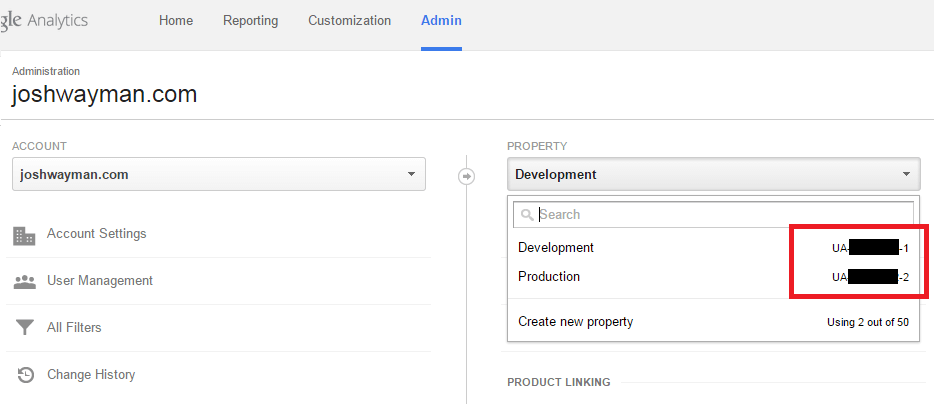
This step is easy. Click admin in Google Analytics, select an account and then click the drop down under property. Create a new one and call it "Development". If this is a new Google Analytics account create another one called "Production". Now you should have at least two properties in this account. The image below shows what it should look like in Google Analytics

Step 2: Create four macros in Google Tag Manager
This is where things start getting clever. Open your Google Tag Manager. If you don't have an account it is really easy to set up a new one. Just follow the prompts.
Now we are going to create four macros. One for our development GA property number, one for our production GA property number, a debug status and a lookup table.
Debug macro
Google Tag Manager has a really useful macro type called Debug Mode. This will set the macro to true when debug mode is active. So go ahead and create a new macro- call it "debug mode active", set the type to Debug Mode and save it. It should look like the image below.
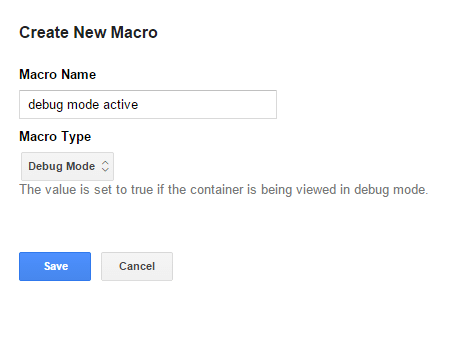
Google Analytics Macros
Two birds with one step. Create two more macros - one called ga development and the other ga production. The macro type is "Constant String" and the value is the Google Analytics property ID.

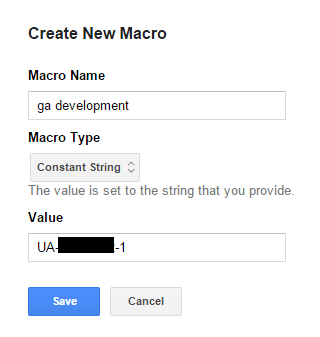
The easiest way to find these is in the property drop down from earlier. They are the two numbers starting with UA. They look like this UA-12345678-1. See the images below.
The Lookup Table macro
Lookup tables are one of the most beautiful things about Google Tag Manager. You can create some seriously complex logic using a number of these tables. For this exercise though we will only be using one.
Create a new macro and call it "ga environment code". Set the macro type to "Lookup Table". Set the default value to {{ga production}} - the curly braces tell Tag Manager it is referring to a macro.
For the "When equals" section, set that to our first macro "debug mode active". Finish the table by typing true and {{ga development}} in the first row and false and {{ga production}} in the second, like the image below.
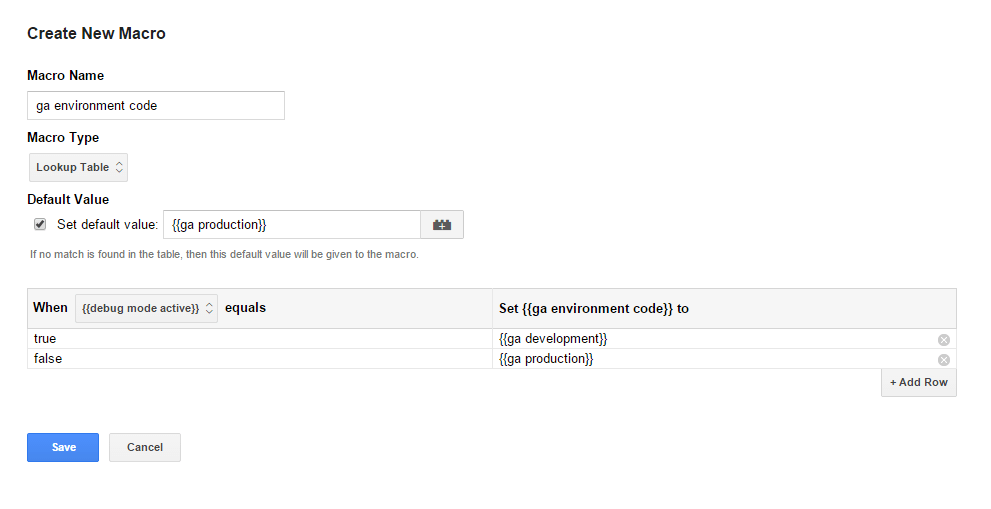
Basically what we are doing is telling Google Tag Manager to set the "ga environment code" macro to either our production or development properties depending on if "debug mode active" is true or false. It is simple and beautiful.
Now you could say we could do this with only two macros, however I prefer to set important things such as Google Analytics property numbers as macros. This way I only ever have one place to update the GA number which minimizes risk of mistakes in the future. It is always safest to create one point of truth when it comes to Tag Manager.
Step 3: Create a new tag
This is the last step. Now we need to create a Google Analytics tag to put our beautiful lookup table macro in.
Create a new tag in Tag Manager. The name is "GA Tracking Code", the type is Universal Analytics. The tracking ID is the lookup table macro typed with curly braces - {{ga environment code}}. Enable display features, set the firing rule to all pages, push save. Done.
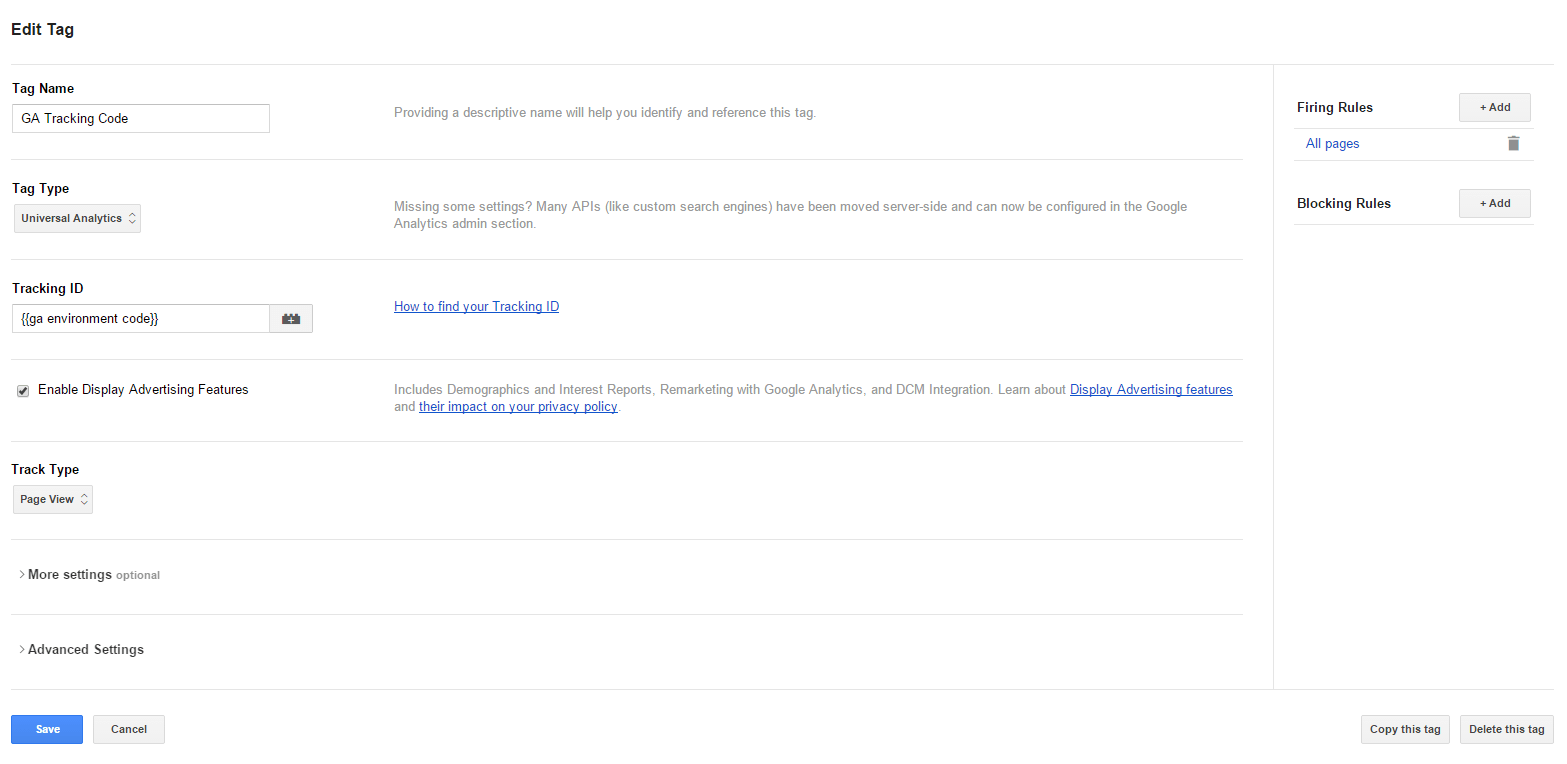
That easy. Now all that is left is to publish your container, sit back and be awesome.
This post was inspired by Simo Ahava. He is a Google Tag Manager wizard and I have learned so much from his blog. He continues to inspire me and my work. Thank you Simo.


